How to Make a Good Screencast
Contents
You’ll Need
Where to Buy Equipment
Camera
Microphone
Background
Light
Camera Setup
Clothes and Appearance
Screen Capture and Virtual Board
Filming and Editing
You’ll Need
- Computer, desk, and chair
- Camera
- Microphone
- At least one good light source
- Background
You’ll have to spend at least $100-150 on equipment. If you want something better, then you’ll need $200-300 for higher quality equipment.
Where to Buy Equipment
All video equipment has a fairly long service life, so you can save money if you buy used products on Amazon, Ebay or auctions. You can also use AliExpress or other cheap online shops.
If you’re not going to create video courses regularly, then you can borrow the necessary equipment from your friends or rent it.
Attention! Please do not buy anything without our approval
Camera
You need one good camera.
The lowest acceptable resolution is FullHD (1080p). Ideally you should have 4K.
Phone
Modern phones have pretty good cameras these days. You can use your personal phone.
If you’re going to buy a new phone, then please get a phone with a good camera. You can choose a Xiaomi or a Samsung among cheaper ones. But perhaps the best cameras are installed on iPhones.
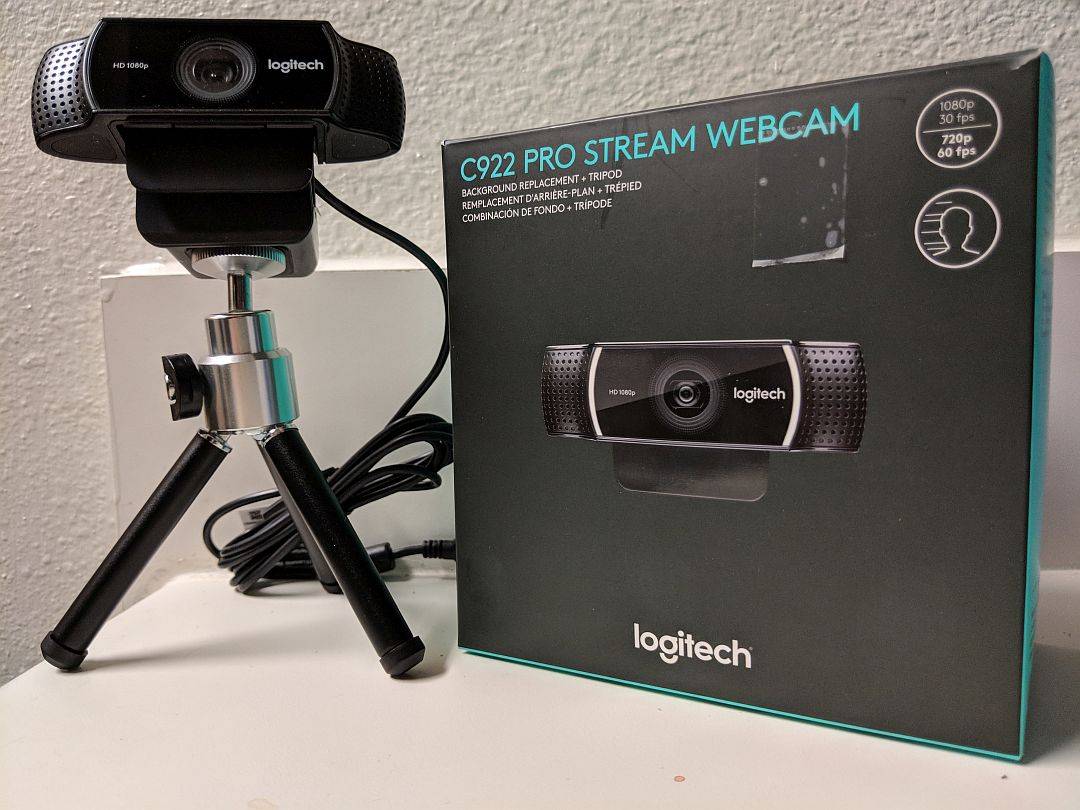
Web Camera
Webcam is the cheapest option you can use to shoot videos. There are many good options on the market. We recommend these two:
- Logitech C922 (used ones from $70)
- Logitech Brio (used ones from $160), this one has 4K
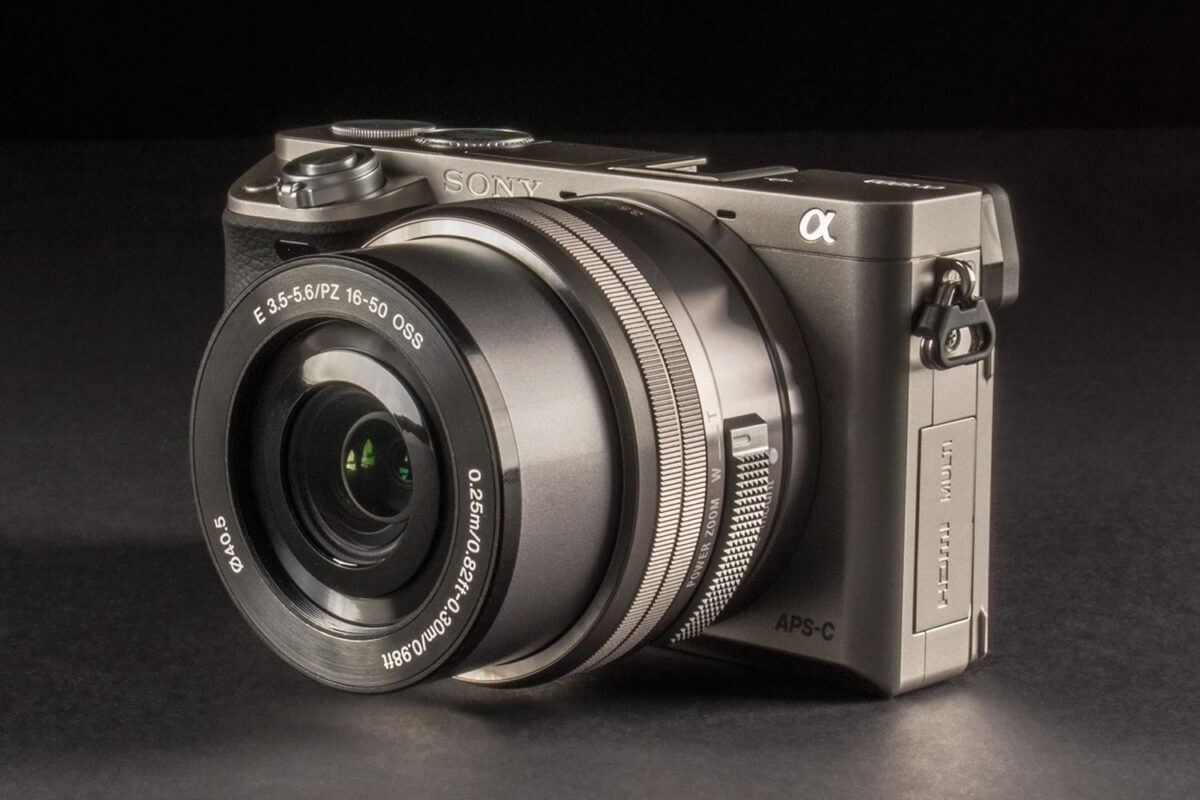
Digital Camera (DSLR)
This is the best high-quality option, although it’s quite pricey.
The main advantages of a DSLR:
- Interchangeable lenses. You can always mount different, more suitable lenses
- A relatively large matrix compared to phone and web cameras, which produces a better and less noisy picture.
We filmed our first courses on Canon 6d + Xiaomi Redmi phone. Now we use Sony A6300 – it’s the best 4K camera within its price range. We bought it with a kit lens for $600.
Sony A6000 is available from $400 and is also a great option. Actually, it’s the same camera that we have but without 4K.
Sony A5000 and Sony NEX-6 (prices from $200) are also sufficient for filming.
There are many other good brands besides Sony, such as Fujifilm, Panasonic, and Olympus. You can always consult with us if you need help choosing a camera.
We don’t recommend point-and-shoot cameras because they don’t have interchangeable optics and are not much better than phones.
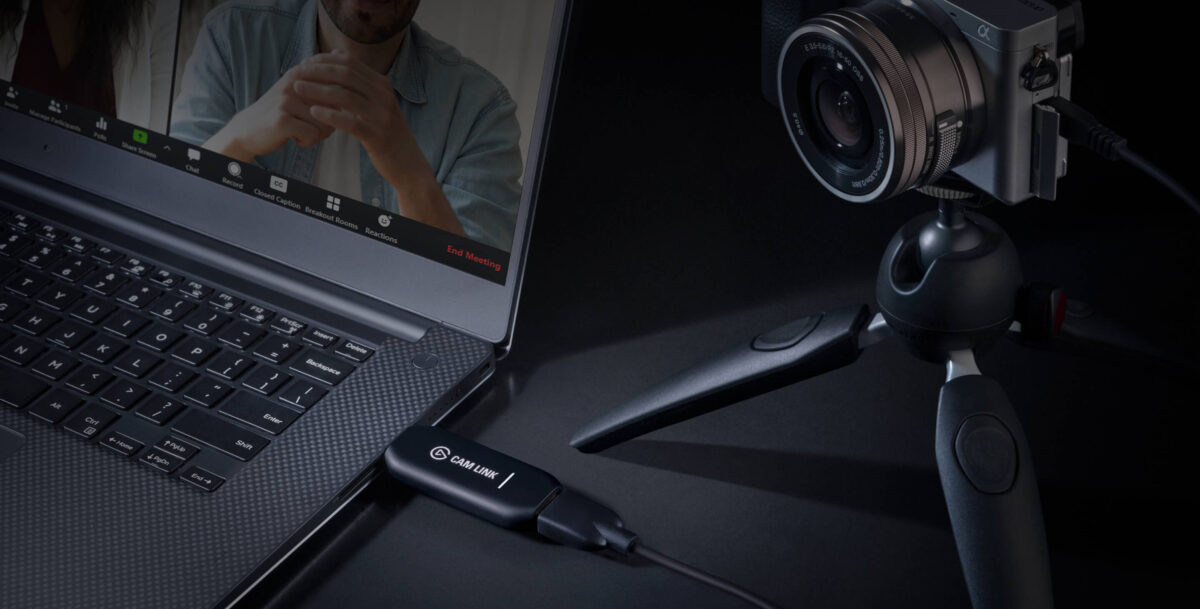
If you’re going to stream or record from a DSLR camera directly to your computer, then you need a capture card. The most optimal one in terms of price and quality is Elgato CamLink 4K. A used one can cost $120.
Microphone
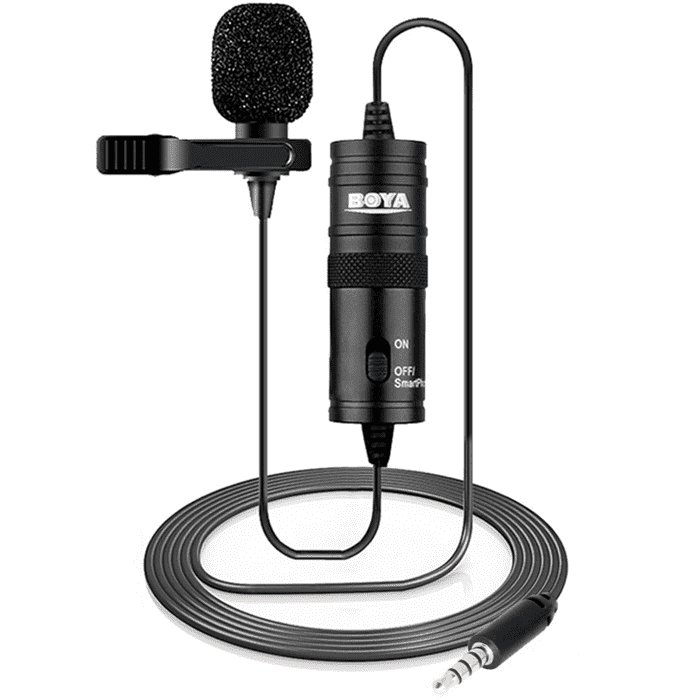
It might be surprising, but sound is the most important thing in a video. That’s why you definitely need a lapel microphone.
BOYA BY-M1 is the cheapest and the most optimal choice, it costs $20-$30. We filmed our first courses using this microphone. You can connect it to your camera or computer.
Please be aware that your camera and computer can record sound differently when using an external microphone. You should compare the audio quality and choose the best option.
Usually, all recording devices have automatic sensitivity settings. It’s better to deactivate this function. The volume level should be not higher than -12 dB while recording.
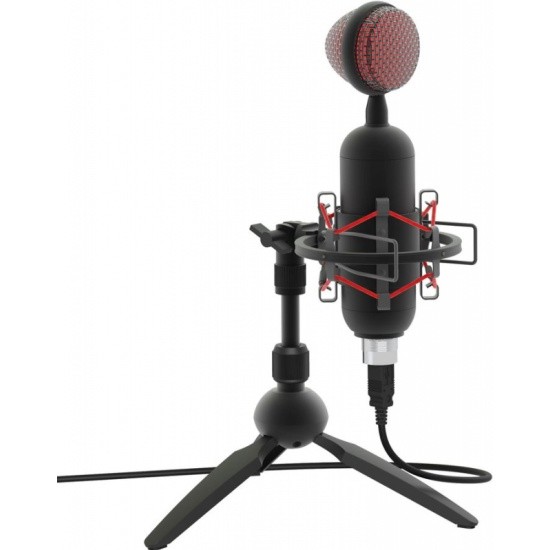
Also, you can buy a condenser studio microphone that can be connected via USB (that’s convenient), if it’s relevant for you. Such a microphone is of better quality, but it can be pricey. Prices of more or less good ones start at $50. But used ones can be cheaper.
If you can afford something better, then please contact us and we will discuss other options.
Background
It’s better to have a well-thought-out part of your apartment as a background. It can be a bookshelf or just a unicolored wall. It’s fine as long as it’s not distracting.
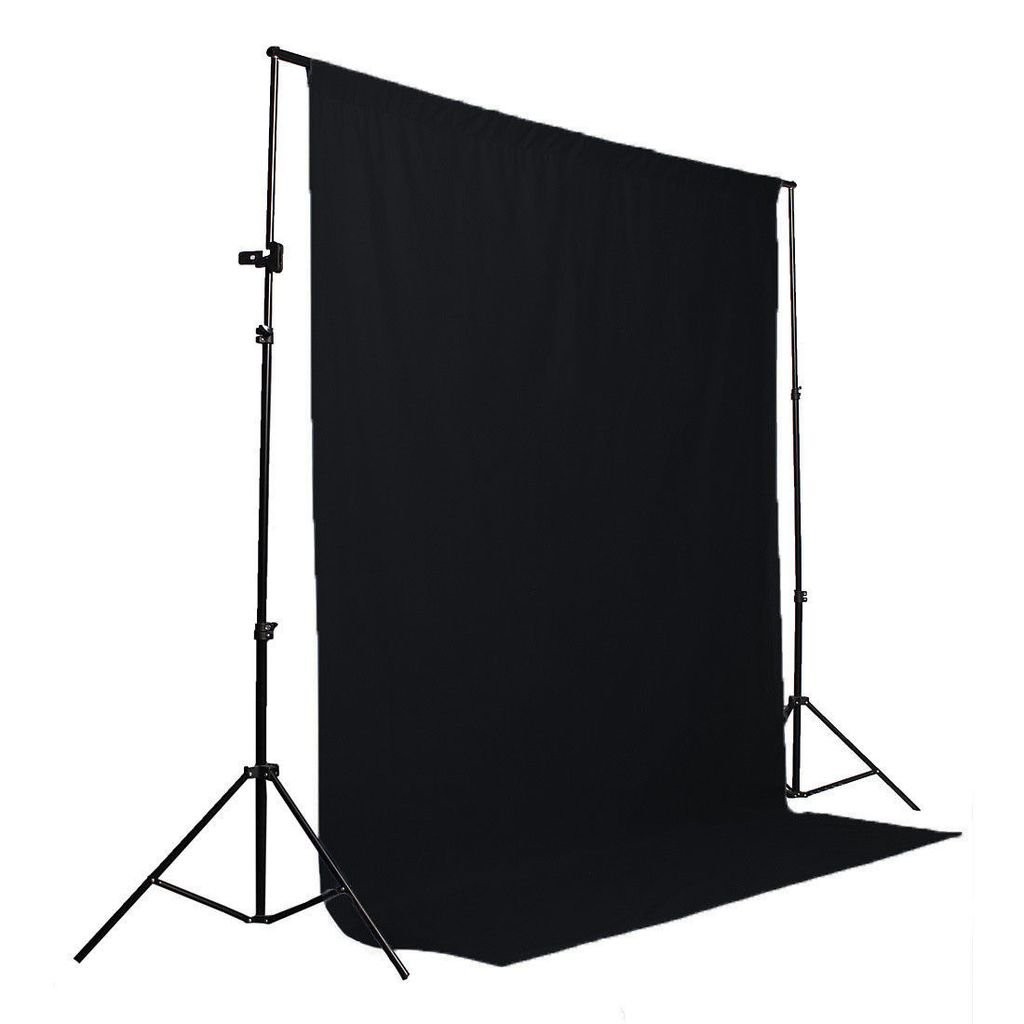
If you don’t have a proper background, then you should buy a special backdrop. It costs $20-30. And in our experience, it’s better to use a black one because it’s easiest to work with.
You also have to think how to set up the backdrop. You can get by with improvised materials or buy a backdrop stand. It will cost you $30-70.
Light
The main secret of a good picture is good light. If there’s enough light and it’s properly positioned then even phone video will look really good.
You’ll have to spend at least $80.
You’ll also have to completely cover the windows to prevent sunlight from affecting the picture. It’s better to use blackout curtains or shoot videos in the evening after dark.
Don’t forget to turn off your regular room light while filming! It’s important to film quickly enough so the light does not change during at least one lesson. If it’s difficult to achieve or the light is not sufficient then you may consider switching to studio lighting.
You need two light sources:
- The main light, which is also called the key light
- Fill light
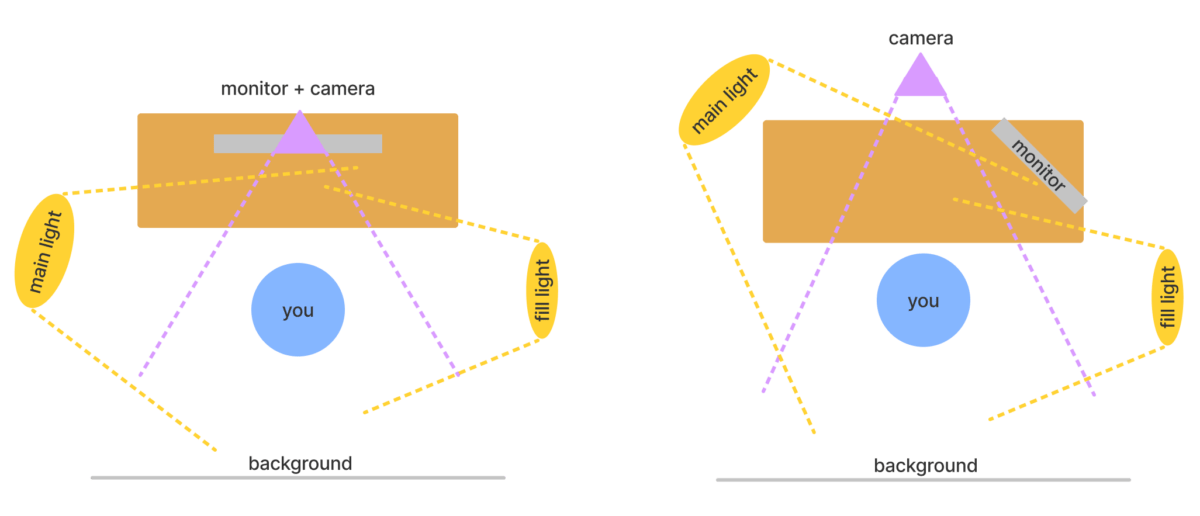
The main light is also called the key light. The lamp has to be quite powerful, but it should not blind you. The filming process should feel comfortable.
The fill light illuminates the shadow part of the face. This lamp should produce about 20% of the main lamp’s light to get a thin shadow on the face:
Which Lamps You Should Buy
Good studio lamps differ from ordinary household lamps in color temperature and color rendering index (CRI). Studios use 5500K lamps. Good lamps have the CRI > 90.
Circular lamps are a good choice for the main and fill light. Prices for one good circular lamp start at $50. Lamps with a larger diameter produce more even lighting and softer shadows. The smallest recommended diameter is 36 cm.
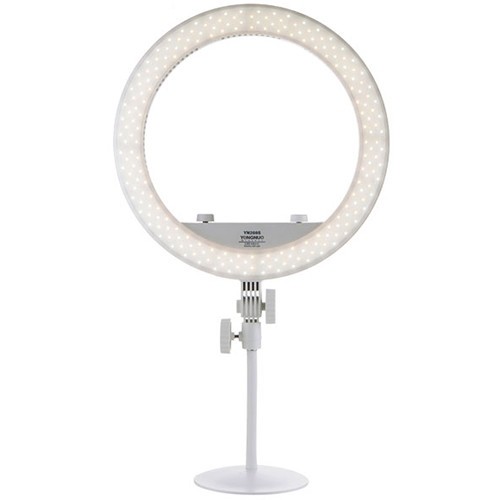
Pay attention to the CRI when you buy lamps. It’s often possible to find cheap circular lamps without any indication of CRI. It means that the CRI is very low. The color temperature should be ~5500K.
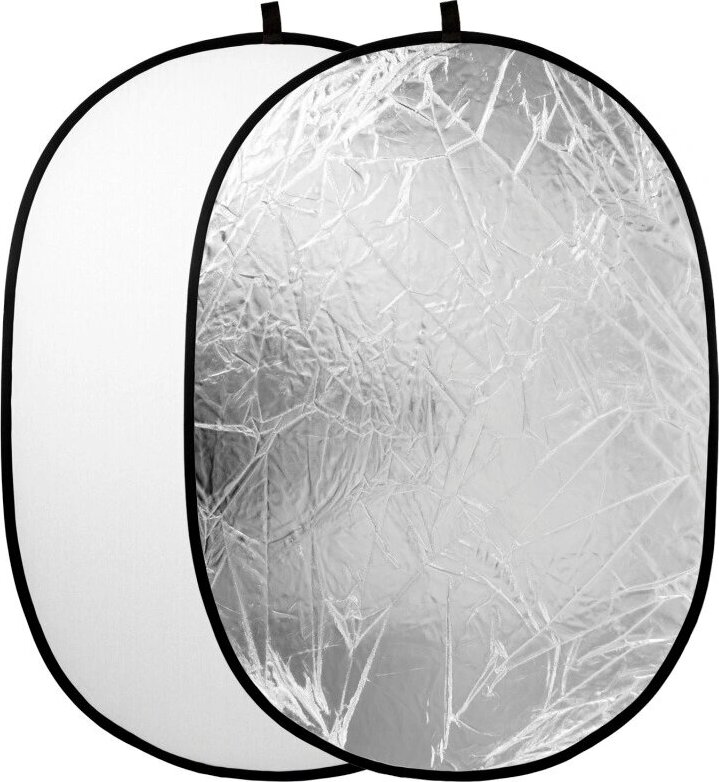
You can try to use a reflector as a fill light. It’s significantly cheaper than a LED circular lamp, but it has to be correctly installed. There are also other ways to save money on a fill light, so don’t hesitate to ask us.
Extra (optional)
Two light sources are more than enough, but if you want more, here’s what you can add:
Backlight. It’s used to separate the person from the background. Usually, it’s a narrow light beam directed from behind towards shoulders and hair so the person does not blend into the background.
Background lighting. It’s used to highlight the background to make it more interesting. If you are using a part of your apartment as a background, then you can place some small decorative lamps there.
Camera Setup
Please pay attention to the camera mode! You should use manual mode to prevent settings from changing while filming. Otherwise it’s difficult to edit videos.
We recommend you to watch this video explaining basic camera settings:

Resolution
Please use the highest possible resolution. It should not be less than FullHD (1080p). The maximum is 4K (2160p). The aspect ratio should be 16:9. If your conditions don’t let you use 16:9, for example if your table is short or something is visible along the frame edges, then you can use 3:2.
Video Bitrate
If it’s possible to adjust bitrate settings on your camera, you should use the highest possible value. A higher bitrate results in a higher amount of data in every frame, and, therefore, it allows for more flexibility when editing. Acceptable bitrate for FullHD is 25-30 mbps, and 50-60 mbps for 4K.
Codec
It’s better to use H.264. Please don’t use H.265 (HEVC).
Frame Rate (FPS)
The preferable setting is a film standard of 24/25 fps.
If you use studio lighting, then you should find out which utility frequency is used in your country – 50 or 60 Hz. These standards correspond to the PAL and NTSC encoding standards. For example, it is 50 Hz (PAL) in Russia. PAL generally uses multiples of 25. Therefore, in order to avoid flickering, you should use 25 fps. In the USA it is 60 Hz (NTSC), so you need to use 24 fps.
The default camera settings are typically NTSC with 24/30/60 fps. You have to switch to the PAL mode to get access to other fps settings.
Shutter Speed
The shutter speed should be exactly two times higher than FPS. If you use 24/25 fps, then the shutter speed should be 1/50. If you use 30 fps, then it should be 1/60.
If you don’t have enough light and your video is too dark, then the shutter speed should be equal to the fps. It means that you need to use 1/25 for 25 fps and 1/30 for 30 fps.
Lens Aperture
Larger lens aperture results in brighter pictures. It’s usually not possible to change it on a phone. The optimal aperture settings on a camera are F3.5 or F4.0.
ISO
ISO refers to the sensitivity of the camera’s sensor. By increasing the ISO, you get a brighter picture. However, high ISO settings may result in larger amount of noise. Thus, it’s always better to film with the lowest ISO possible.
Exposure
The three discussed parameters – shutter speed, lens aperture, and ISO – define exposure, i.e., how bright or dark your video is. In our situation the shutter speed and the lens aperture are practically fixed, hence the right frame brightness depends on the ISO. If you have to set the ISO too high (more than 800), then your lighting is not enough and you have to rearrange it.
Focus
Manual focus is preferable in order to avoid accidental changes of the point of focus. It’s especially important if autofocus of your front camera is not good. Please always make sure the picture is in focus.
Zoom
Please do not use digital zoom!
Usually only photo cameras (DSLR) have optical zoom. You can use it if the lens is initially wide-angle or if something unnecessary is visible along the frame edges.
Camera positioning
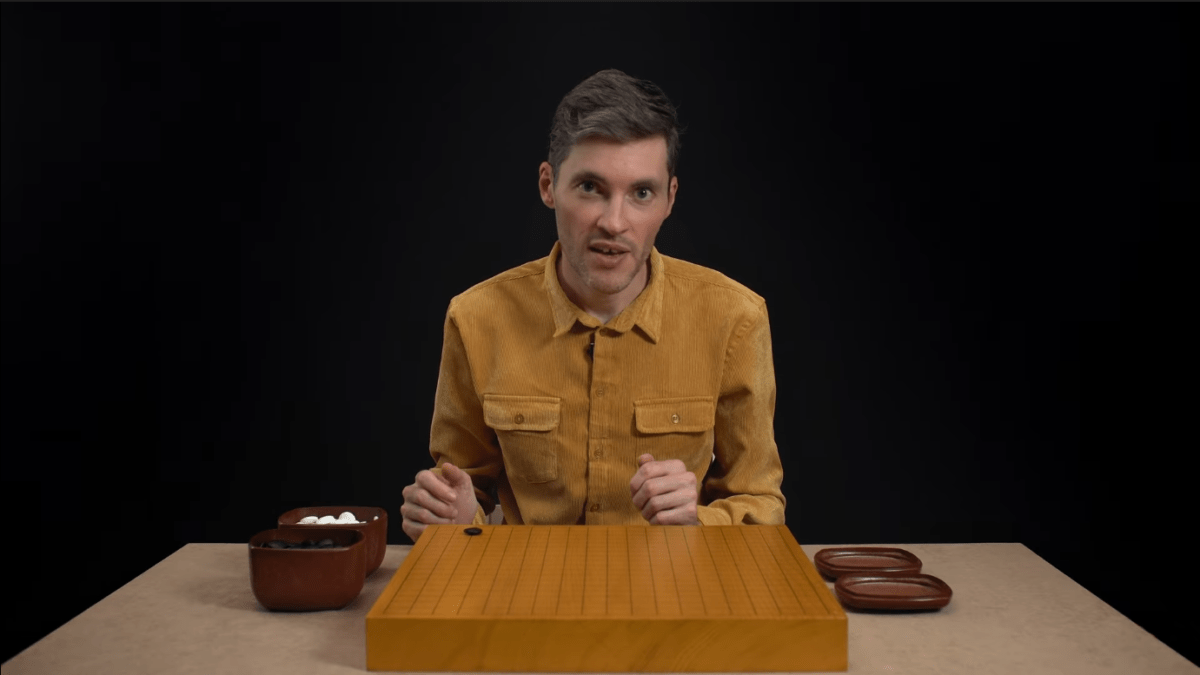
The front camera should be placed slightly below the teacher’s eye level, so that he or she would seem to naturally look into the viewer’s eyes. At the same time, the head should be approximately at the level of the golden ratio, i.e., in the upper third part of the frame. There should also be some space left at the top.
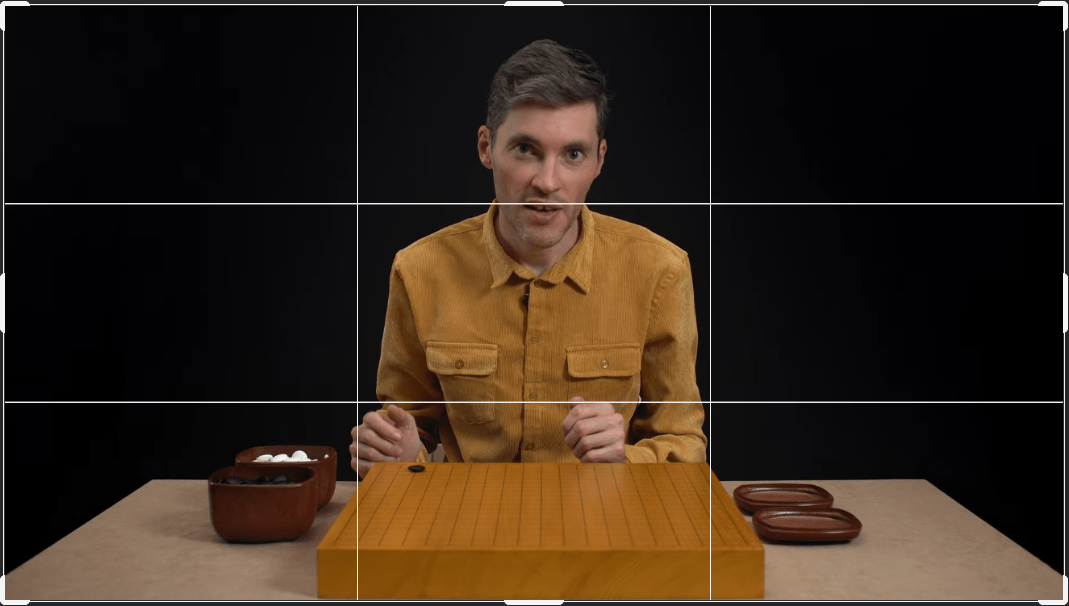
We recommend turning on the grid lines to set up your camera easier.
White Balance (WB)
This is probably the most difficult part. It’s better to adjust the white balance manually so it won’t change while filming. The colors should look natural. And white should be absolutely white, without a tint of green or purple.
Photo cameras usually have a manual mode for adjusting the white balance. You should take a photo of a white sheet of paper with all of your lights on. The camera will calculate the WB. Professional photographers usually use a special gray card for this.
Phones have their WB set in Kelvin. Choose a value that visually looks natural.
If you can’t manage to adjust it manually, use presets like “daylight”, “cloudy” or others.
Automatic WB can be used only when filming with natural light.
Color Profile
If your camera has color profile settings, you need to choose the most neutral one. It’s also preferable to have the lowest level of contrast.
Color Checker
It’s an additional tool for faster and better color correction of videos during post-production. Technically, you only need to show it in the video once while filming. Prices of new good color checkers start at $50. You can also buy a used one or just borrow it from a photographer friend.
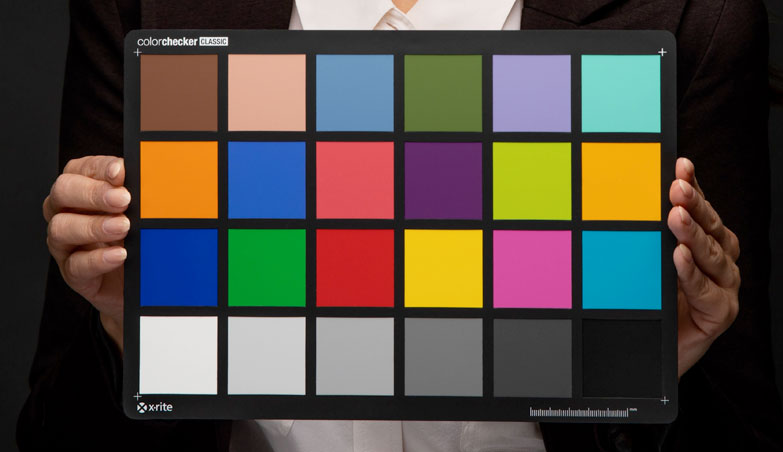
It’s great if you have a color checker. But it’s not a problem if you don’t.
Manual Phone Settings
Native apps usually don’t have manual settings. If so, you’ll have to install a special app that supports it.
Android: Open Camera, Manual Camera, FiLMiC Pro
iOS: ProMovie Recorder, FiLMiC Pro
Manual Webcam Settings
Webcams usually allow manual settings. They are available in the native app or in OBS.
Please help me set up my camera!
All cameras have different configurations. You’ll have to figure everything out on your own. You can try to find videos on YouTube about your camera model.
If you have any problems or questions, please don’t hesitate to contact us.
Short summary
- Set your camera to manual mode
- Highest possible resolution and bitrate
- FPS 24 (NTSC) in USA
- Shutter speed 1/50
- Lens aperture F3.5-4
- Manual white balance
- Neutral color profile
- Manual focus
Clothes and Appearance
Clothing should not be too casual. We recommend using a unicolor shirt which creates a good contrast with your background.
Screen Capture and Virtual Board
We recommend that you use the Sabaki app with our theme gomagic-screencast.asar as a virtual board. Just choose this file in the Sabaki setting menu.
Coordinates and the Fuzzy mode (when stones are placed with an offset) should be turned off.
You need to prepare two files and send them to us, and we will process and edit them:
- Video from the camera
- Video from the computer screen
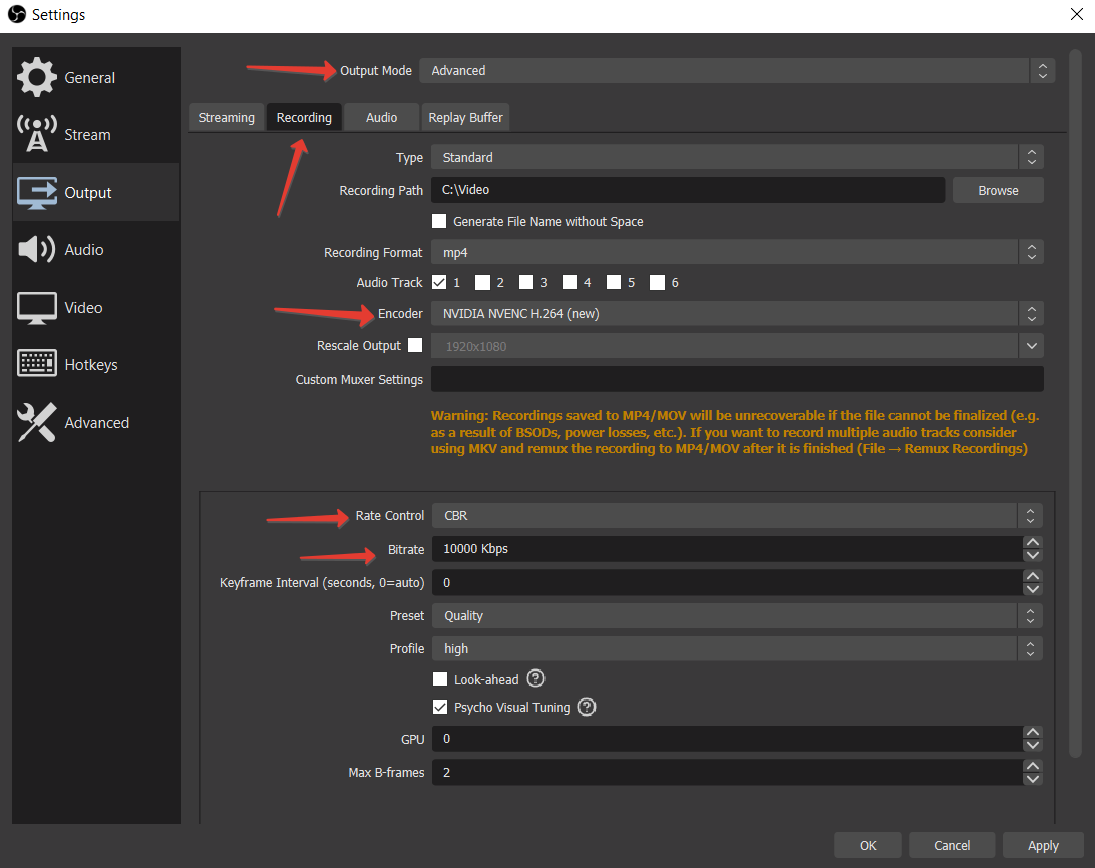
Please use OBS with the following settings to record the screen:
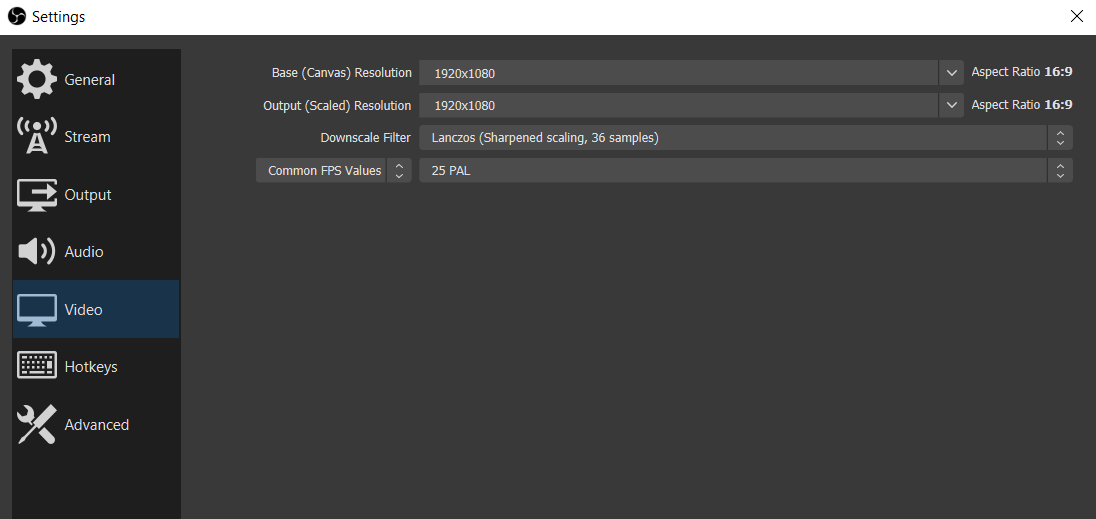
- The highest possible screen resolution
- 15000 kbit bitrate (15 mbps)
- The same FPS as the main camera
- Downscale Filter — Lanczos
- MP4 recording format
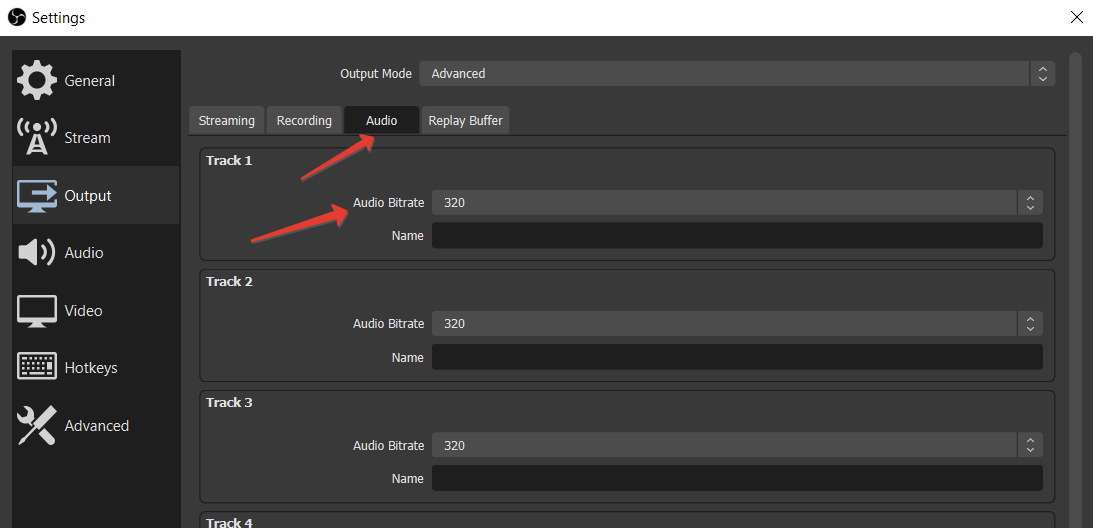
- 320 kbps audio bitrate (maximum)
In order for us to be able to synchronize the two videos (front camera and virtual board) both of them should record the sound. Quality of the additional microphone does not matter.
The only thing is that the computer sound (stone clicking) and the sound from the microphone in OBS should be recorded separately. You can watch this video to see how to do it: https://www.youtube.com/watch?v=ZdFeCaStTbw
If you have never used OBS before, and you’re having trouble, then you can look for tutorial videos on YouTube or ask us.
Filming and Editing
Firstly, make sure that everything is set up properly. Also, please make a test video and send it to us.
Then fix your settings, or better write them down! We also recommend that you mark positions of your equipment on the floor to reinstall it easier next time.
Please don’t change any settings during the entire course!
Please keep in mind that we will process and edit all filmed videos. For example, you can show something expecting some graphic elements to appear in the video after editing. Don’t worry if you can’t film everything in one take, we will choose the best parts and merge them. In other words, we will add some magic!
Course Creation Guide
How to Make a Course with a Real Board
How to Make a Good Screencast (you’re here)
Designing a Course
Memo for Course Authors